
Groups – Using Infobase Groups
Infobase groups have the ability to group a number of staff members and students together. These groups can then be used in Intouch for sending emails and sms’s.
How to manage groups
Navigate to: Infobase > Groups > View
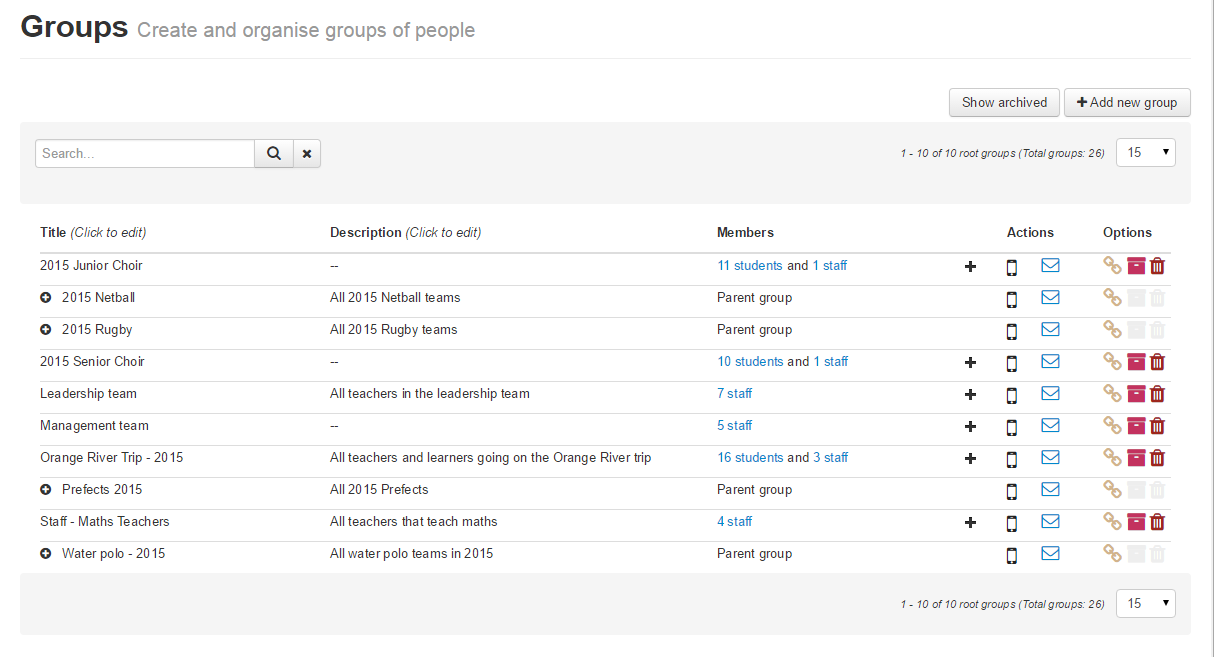
The initial groups page will show a selection of the groups in alphabetical order. Use the page navigations to navigate between the pages of groups.
Searching for groups
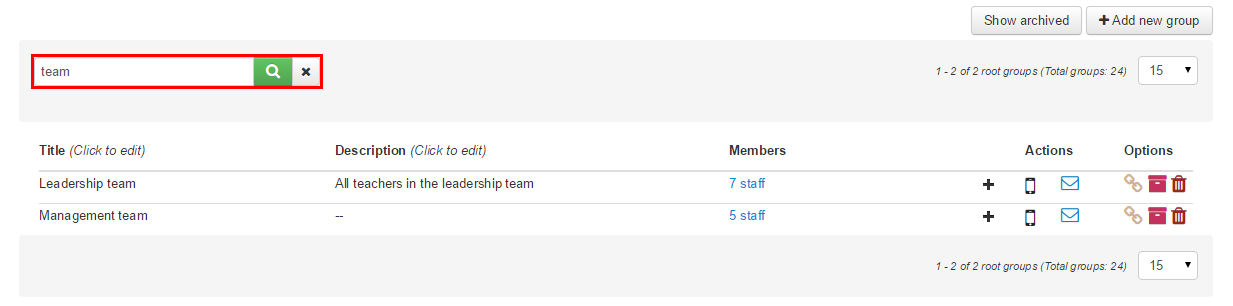
To search for groups enter the search criteria in the search box and click on the search icon. The search icon will turn green to indicate that the search criteria is being applied to the results.
When you navigate to another group page the search will still be applied.
To clear the search, click on the x (clear search) icon. This will result in the all the groups being displayed in the list and the search icon returning to its normal colour.
If any of the sub-groups of a root group match the search criteria, then the root group will be shown in the searched list.
Adding new groups
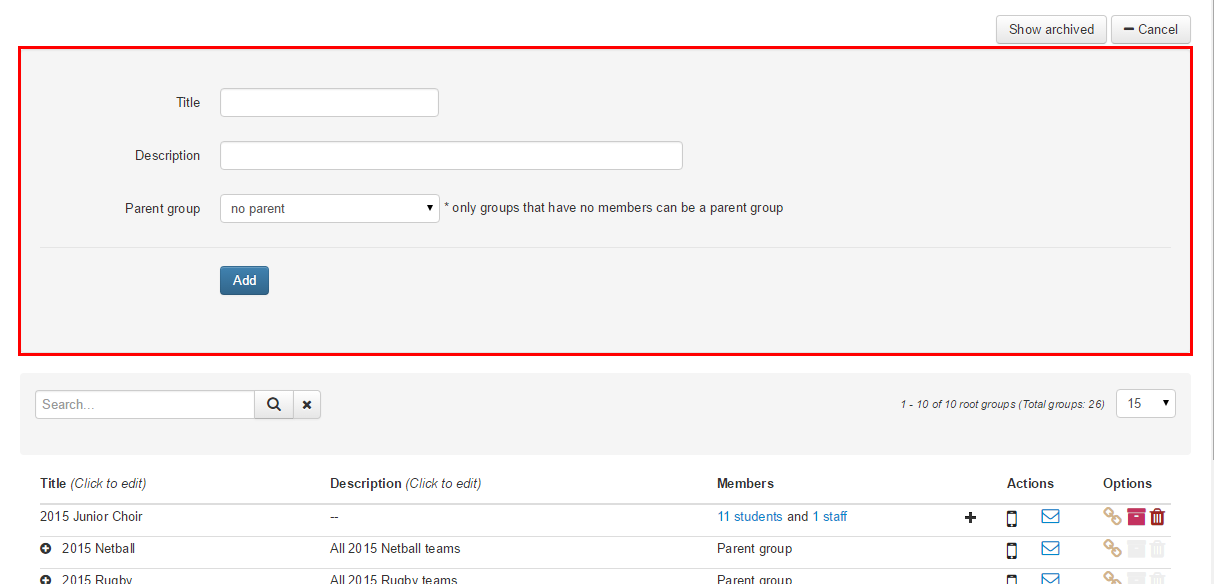
Select the “Add new group” button as shown below.

You can now enter the title of the new group and a description for the group. If the group is year specific it is best to put the current year in the title in order to differentiate it from future and past years – e.g. “U12 Rugby – 2015”
If you want to make the new group a sub-group of an existing group, then select the parent group from the list. Selecting “no parent” will make this a top level group. Note: Only groups that have no members can be parent groups.
Sub-groups
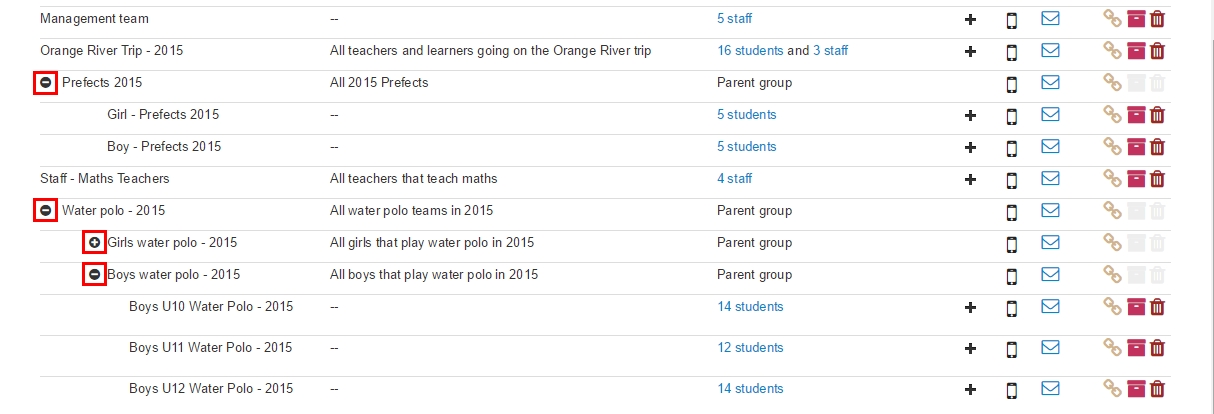
If there is a plus icon next to a group as indicated in the image below, then the group has sub-groups. In order to see the sub-groups click on the plus icon, which will then show all the sub-groups under that group. Clicking on any plus icons on the newly expanded sub-groups will intern expand the sub-groups under that group.
Clicking on the minus icon next to an expanded group will cause all of the sub-groups to be collapsed.
The indentation of the group title indicates what group is a sub-group of a parent group
Email and SMS actions
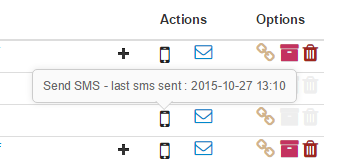
The sms and email icons next to each of the groups can be used to send email and sms messages to members of those groups.
Hovering over the email or sms icon will display when the last email or sms was sent to that group.
Sending an email or sms to a parent group will send to all the members of sub-groups group as well. For example in the image above, if a message is sent to “Prefects 2015” all the members of the “Girl – Prefects 2015” and “Boy – Prefects 2015” will receive the message.
Parent linking
Clicking on the link icon next to a group will allow the group to be linked to a parent group. This group will then become a sub-group of the parent group. Only groups that don’t have members can be parent groups.

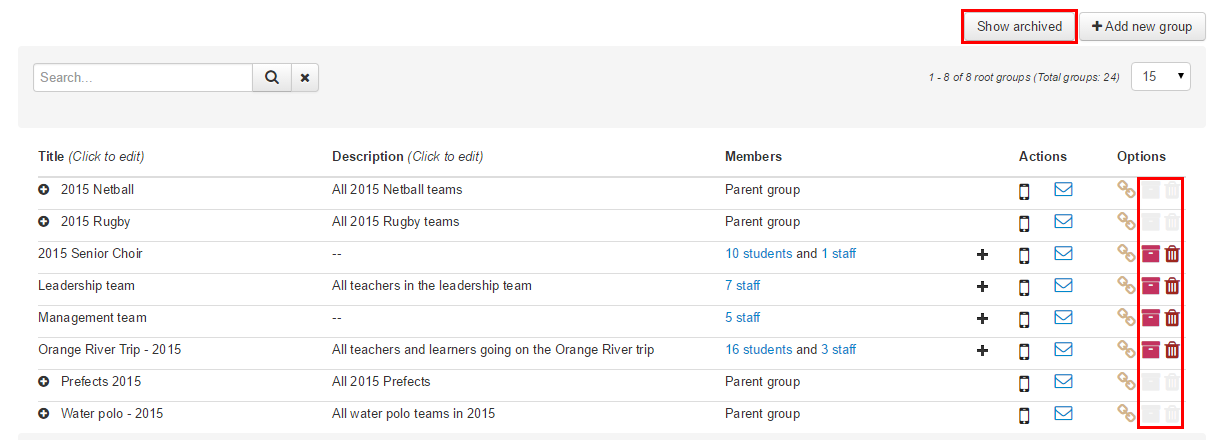
Deleting and archiving groups
Clicking on the delete icon will allow the group to be permanently deleted.
A group can be archived by using the archive icon. Archived groups will not be visible by default on the groups page. The “Show archived” button at the top of the page will make all of the archived groups visible. Archived groups can then be restored by clicking on the “Unarchive group” icon.
Actions like group membership management, email, sms and linking cannot be performed on archived groups. The group will need to be restored before these actions can be performed.
Note: Only groups that have no sub-groups can be archived or deleted. The archive and delete icons will be grayed out for groups that have sub-groups.
Membership
The number of staff and student members in each group is displayed next to the group description. Clicking on the students or staff link will display a box listing the student or staff members of the group.
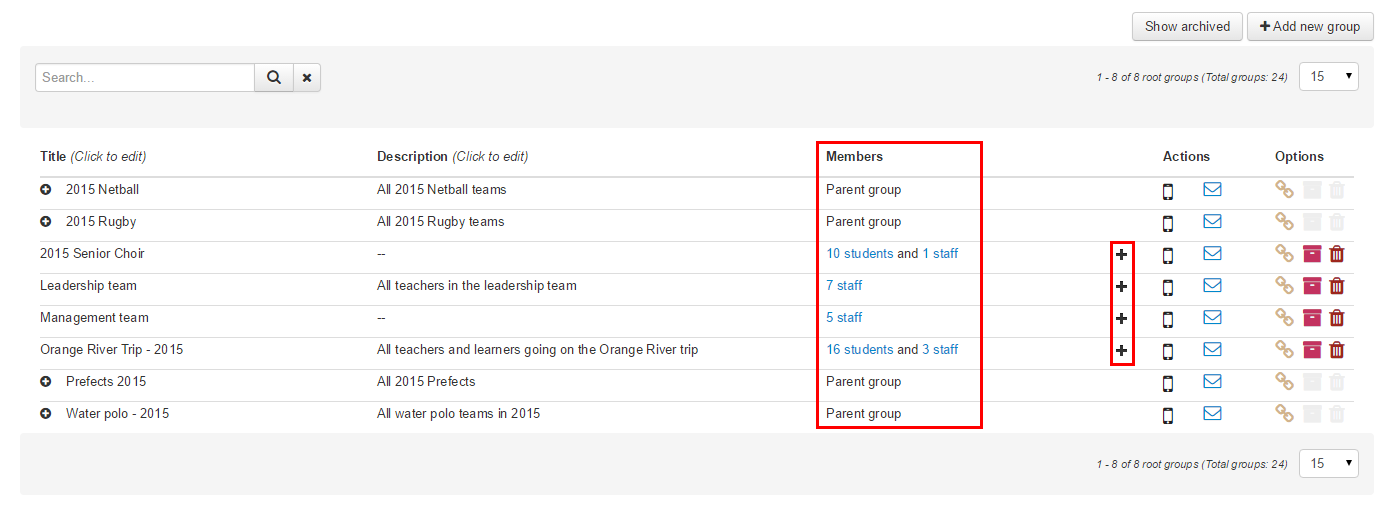
Clicking on the plus next to the members will navigate to the group membership management page as below
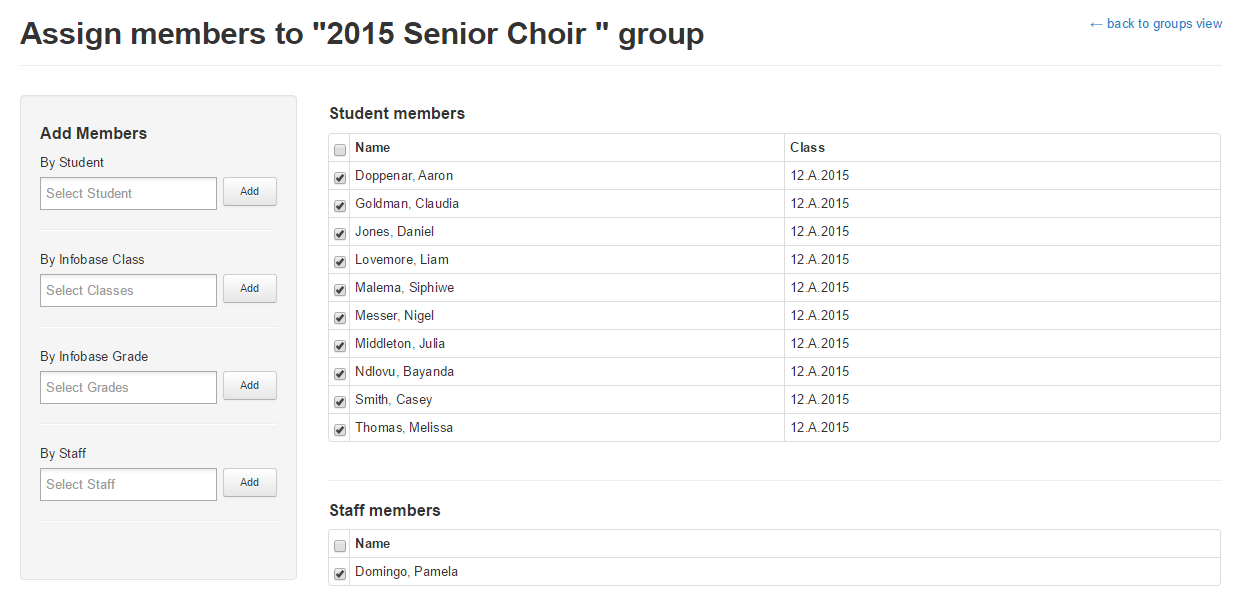
The add members box on the left allows members to be added by different categories
- Student – add individual students. Multiple students can be selected from the list
- Class – this will add all students that are in a class or classes
- Grade – this will add all students in a grade or grades
- Staff – add individual staff members. Multiple staff members can be selected
Members can be removed from the list by selecting the checkbox next to their name
Can’t see the options and screens we’re talking about above?
Staffroom features are controlled by permissions so if you can’t see the options and screens we are talking about you may need to talk to your Staffroom Administrator. The permission to enable this feature is under Settings > Roles & Permissions> Infobase > Manage Groups ( and Create Groups)