
Students, Staff & Parents – Editing Custom Profiles
Staffroom profiles allow for customisation of nearly every aspect of the profile records, including:
- Fields – types of fields and data they should contain
- Layout – position of fields on the screen
- Validation – rules to ensure data integrity and completeness
The incorrect editing of custom profiles can have unintended consequences such as exposing sensitive information to staff who should not be able to see or edit it. If you are unsure about a change you wish to make please contact support for further assistance.
In order to be able to create or edit custom profiles you must have the Core > Manage Custom Profiles permission. Usually only system administrators would have access to this feature.
To access the custom profile editing and configuration options you can navigate to Settings > Custom Profiles:
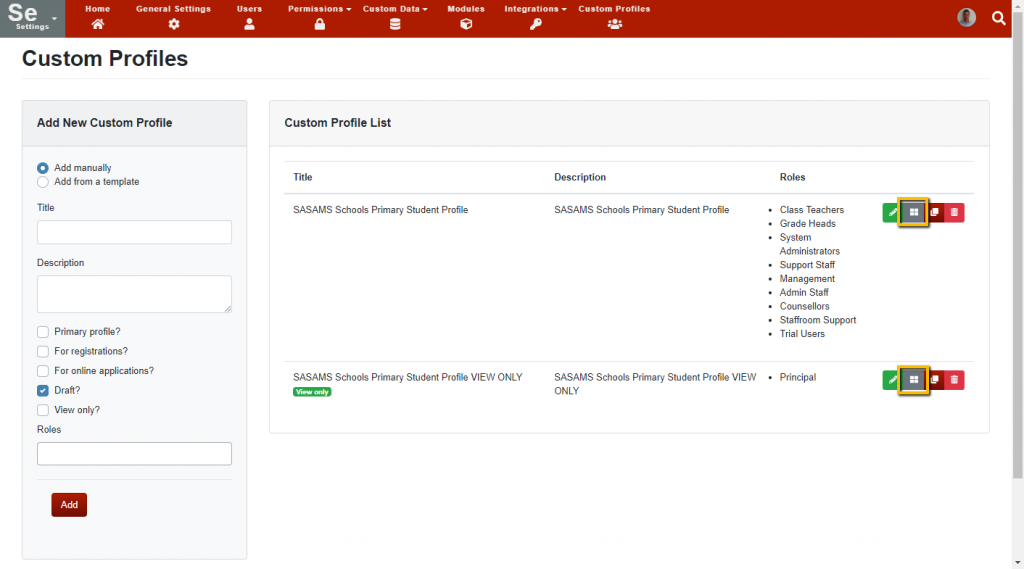
- To edit a profile click on the edit button on the right hand side of the profile you wish to edit.
- To create a new blank profile you can use the panel on the left to select the “Add manually” option.
- To create a new profile based on a template you can use the panel on the left selecting the “Add from a template” option.
- To create a copy of an existing profile you can use the clone button next to the profile you wish to copy.
Profile Role Assignment
It is possible to assign roles to profiles. When users navigate to the student, staff or parent profile in Staffroom they will see the profile view that is assigned to their role. Creating separate profiles for different user roles allows you to create different views of the student, staff and parent records for users e.g. read only views for users who should not need to edit student, staff or parent details.
Layout
The layout of profiles can be arranged into sections so that you can group related fields together. Sections can be further divided into columns and fields can be placed within them:
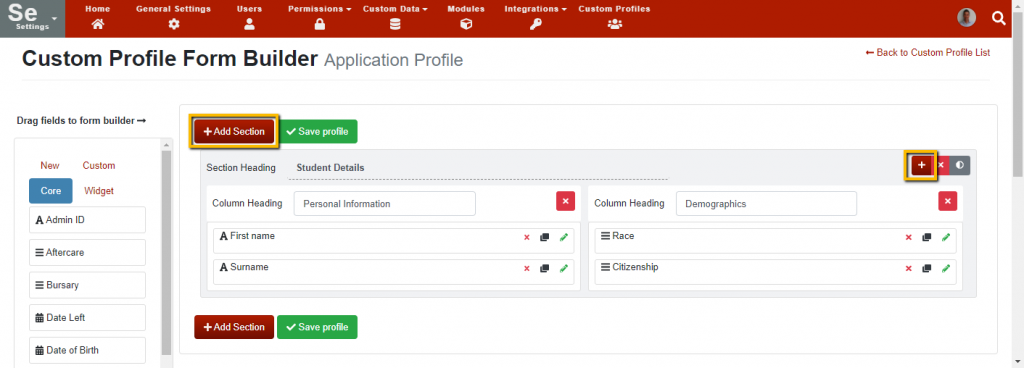
- Use the Add Section button to add a new section to a profile.
- Use the Add Column button to add a new column within a section.
You can change the position of fields within sections and columns by dragging and dropping the fields. Remember to save any changes you make by pressing the Save Profile button.
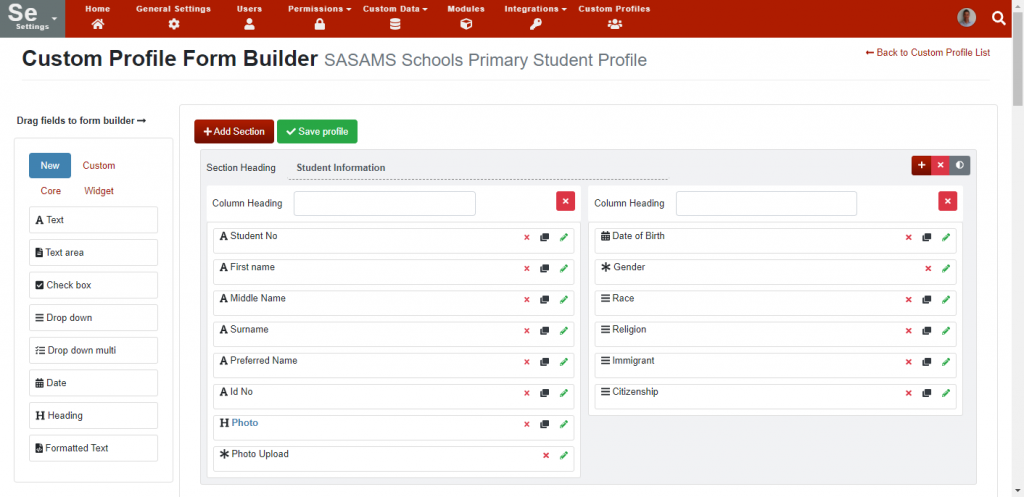
Fields
Fields can be added and removed from custom profiles by dragging and dropping them in the Custom Profile Builder:
You can edit profile fields in the following ways:
- Add fields to a profile by dragging them from the panel on the left into the layout in the middle of the screen.
- Remove fields by clicking the red x button next to a field.
- Create a copy of a field using the copy button next to a field.
- Edit a field’s properties (attributes, constraints and conditions) using the green pencil button next to a field.
- Remember to save any changes you make by selecting the Save Profile button.
There are different types of fields that are available for use:
- Core – these are fields that are available in all Staffroom sites.
- Custom – these are existing custom fields that are only available in your Staffroom site.
- New – this allows you to create a new custom field that will only be available in your Staffroom site.
- Widget – these are complex preconfigured fields with special functionality.
Editing Fields
There are many properties available to control how a field looks and behaves when it is displayed on a custom profile. You can edit the properties of a field by clicking on the green pencil button next to a field:
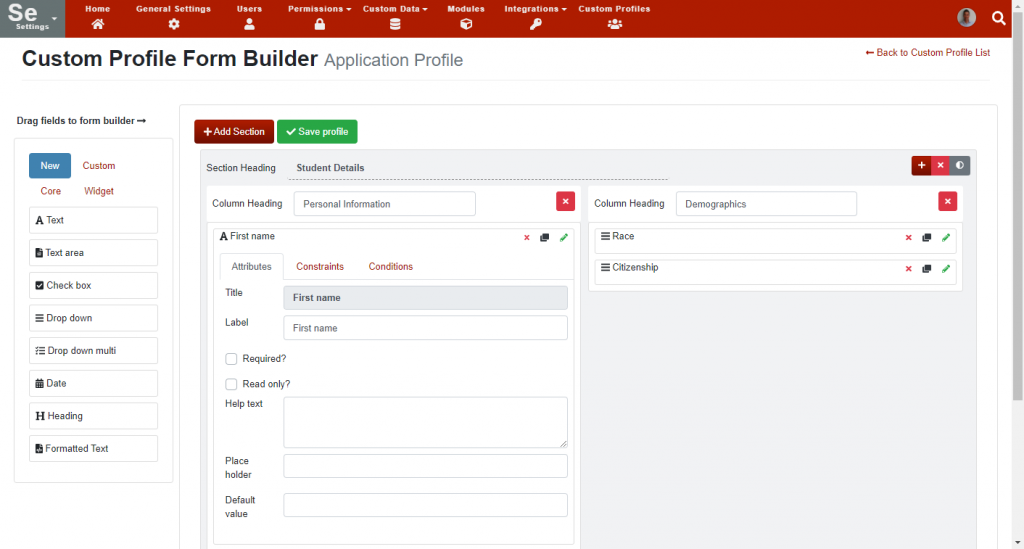
The attributes tab for a field includes the following options:
- The title of the data field (this may not be editable).
- The Label to be displayed next to the field on the profile.
- Whether the field is a required field (data must be entered into it).
- Whether the field is read only (the data in the field can not be edited).
- Help text that may assist the user in understanding the purpose of the field (this is displayed when you hover over the field).
- Place holder indicates the format of data that should be entered into a field e.g. a date format such as YYYY-MM-DD (displayed in the empty field).
- A default value for the data in the field (will be pre-filled into an empty field).
The constraints tab for a field allows you to create validation rules that ensure the correct types of data are entered into the field. Constraints allow for validation of the length of data, greater that / less than, and special cases such as valid email addresses and SA ID numbers. Multiple constraints can also be combined for a single field.
The conditions tab allows you to create validation rules between different related fields in a profile e.g. you can create a condition that requires the entry of a study permit expiry date if the study permit field is set to yes. Conditions can also be used to automatically hide, disable or clear values from the field based on the value of another related field on the profile.