
Setup – Creating Courses
Teaching at most institutions and schools is organised into areas of study. At different institutions the area of study may be referred to as a subject, class, module, or course. In Staffroom Assess2 we refer to an area of study as a course and we use courses as the place to keep all the detailed assessment results. In Assess2 setting up a course is an important step in the process of setting up for capturing and reporting on assessment.
Courses can be created in two different ways:
- Using a pre-loaded CAPS template
- By manually adding the necessary assessment details
Step 1: Navigate to the correct category
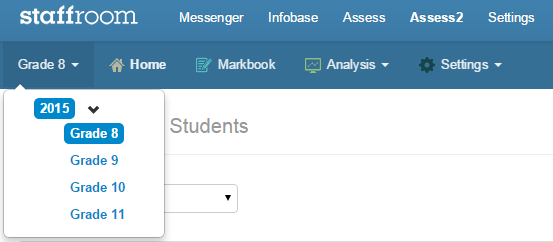
Navigate to the category you want to add the new course to using the category menu at the top left corner of the Staffroom Assess2 screen. You may need to create a new category if you have not already created a suitable one. In the example below we have already created categories for 2015 and within that for Grades 8 to 11. Select the category you want by clicking on it (you can expand sub categories in the menu clicking on the black > chevron).
Step 2: Create a Course
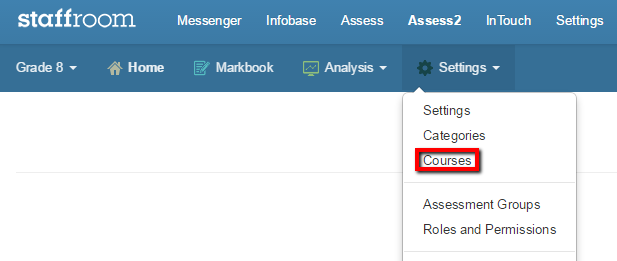
Once you have selected the category where you want to create a course you can create a new one via Assess2 > Settings > Courses.
This will take you to the Courses screen for that category where you can add new courses either manually or using a pre-loaded CAPS template. We will describe both approaches however, the CAPS approach has many advantages (if your school uses CAPS) so we will describe that first:
Step 3: Use a CAPS Template
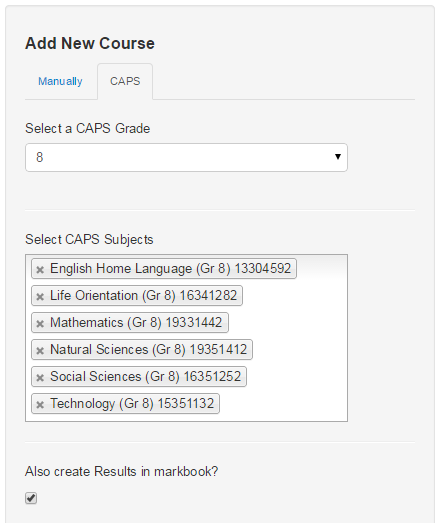
To create a course use the “Create a New Course” panel on the left hand side of the screen. To use a CAPS template click on the “CAPS” tab to display the CAPS course creation options. When these are displayed you should:
- Select the grade you want to create courses for from the “Select a CAPS Grade” drop down list.
- Once a grade is selected the “Select CAPS Subjects” field will show. You can use this field to choose the CAPS subjects that you wish to create. A course will be created for each subject that you select in this field. Clicking in the field should display the subjects available and typing a * will select all of the subjects available for that grade.
- IMPORTANT – you should check the “Also create Results in Markbook” checkbox so that all of the tasks and calculations are added to the markbooks for the new courses.
- Click the “Add” button to create the new courses and their markbooks.
Completing these steps will create new courses based on the selected CAPS subjects. The advantages to this approach are:
- CAPS subject names and descriptions match those used by the South African DOE.
- All tasks and calculations match those used by the South African DOE.
- All tasks and calculations in the markbook are linked for reporting purposes i.e. with subject schedules.
The advantages described above yield a significant reduction in time and effort in setting up CAPS markbooks. You will also be able to report using subject schedules in the same format as that provided by the DOE. These advantages are significant which is why we recommend South African schools to setup their markbooks using CAPS templates when starting out with Assess2.
If you have decided to use CAPS templates to create your courses then your task is completed at this point. If you can’t use CAPS templates then you will need to create your courses manually…
Step 4: Create a Course Manually
To create a course manually use the “Create a New Course” panel on the left hand side of the screen. If not already displayed, click on the “Manually” tab to display the manual course creation options. When these are displayed you should:
- Enter a course title, code and description
- Select the administrator of the course (this is a teacher with access to modify the setup of the course’s markbook. NB: it might not be the same teacher as the one teaching the course).
- Click the “Add” button to create a new course with an empty markbook.
A new course will be created with the details you have entered.

Step 5: Create Results in the Markbook
The course created in the previous step will have an empty markbook. This means that the markbook will not yet contain any assessment tasks or calculations. You will need to navigate to the markbook setup page and add the details that you require. You can navigate to the markbook setup page using either the markbook setup button on the course setup page:
![]()
…or using the markbook settings button at the top right of a course markbook:
![]()
There are four different types of results that can be added to an Assess2 markbook:
- An “Activity” is a result you use to represent some kind of assessment activity that has a simple mark e.g. a mark out of 100 or a letter like A, B or C. Activities can use numeric marks e.g. an examination that is marked out of 50. Activities can also use custom predefined scales e.g. SA Schools codes 1 to 7 or a letter based scale A to F.
- A “Result Set” is a result that is calculated or derived from another result in your markbook. Result Sets can use the marks captured in other activities or result sets in their calculations. Using result sets you can combine multiple marks and use a variety of calculation types such as sum, average, weightings and others.
- A “Comment” result is one that consists of some text e.g. end of term comments or principals comments. Comment results can be either simple text or based on predefined text templates.
- A “Rule Based Result” is one that uses a logical rule to decide the mark displayed. These results can be used to generate promotion results, based on a set of promotion rules.
You use the “Add New Result” panel on the left hand side of the Markbook Setup page to add individual results to a markbook. The different kinds of results described below have quite different options and we have provided more information on creating results (see the link below).
Okay, so what happens next?
Once you have set up your categories and courses you will probably need to create assessment groups so your teachers can start capturing marks.