
Setup – Creating Assessment Groups
Assessment groups are what is used to enroll students and teachers into courses in the Staffroom assessment module. It is possible to create assessment groups that contain ANY combination of students, teachers and courses.
Note that assessment groups live within categories so any assessment group you create will only be visible within the category you create it in.
Assessment groups can be created quickly and easily with the following steps:
- Navigate to the correct category (year and grade)
- Create the assessment group
- Add students to the assessment group
- Add courses to the assessment group
Step 1: Navigate to the correct category
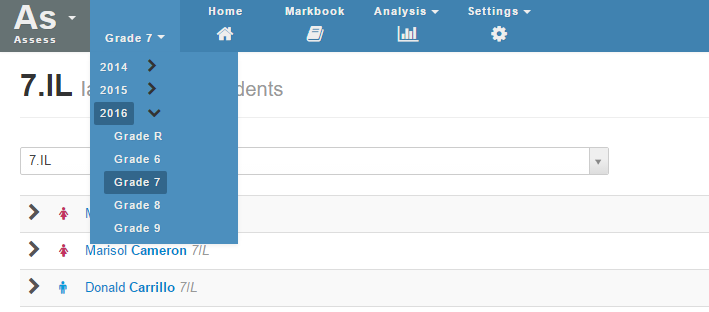
Navigate to the category you want to add the new assessment group to using the category menu at the top left corner of the Staffroom screen. You may need to create a new category if you have not already created a suitable one. In the example below we have already created categories for 2015 and within that for Grades 8 to 11. Select the category you want by clicking on it (you can expand sub-categories in the menu clicking on the black > chevron).
Step 2: Create the assessment group
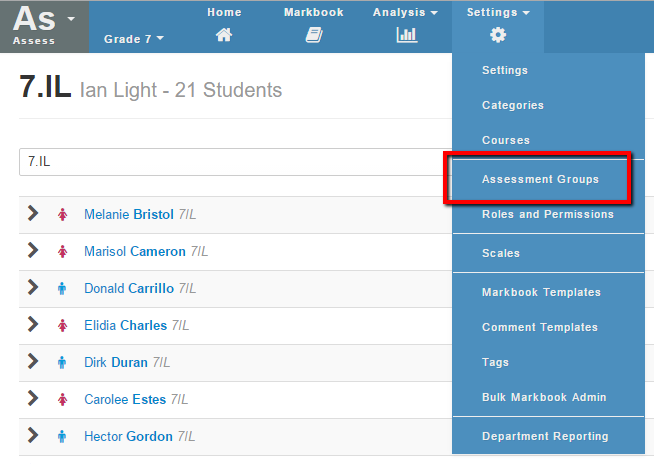
Once you have selected the category where you want to create an assessment group you can create a new one via Assess2 > Settings > Assessment Groups.
This will take you to the Assessment Groups screen where you can create new groups in a couple of ways:
- Manually – where you select students, teachers and courses you want to add.
- From InfoBase Classes – where the group is automatically created with the same name, students and teachers as the selected infobase class.
We’re going to show you how to create an assessment group manually in this example. I’m going to create an assessment group for a grade 8 English course that I am teaching. To do this I need to use the Add New Assessment group panel on the left of the screen and enter a name and description for my group:

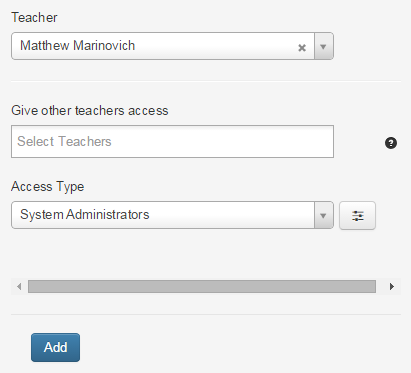
In the same panel I can also select:
- Main Teacher – this teacher is the main teacher and they have full control and access to the student results in this group.
- Other Teachers – these are teachers who are also involved with this group and they can be given different permissions e.g. just the ability to view results for students in the group.
Add a main teacher to your group and then press the add button at the bottom of the screen in order to create the new group:
This will create a new assessment group with just the teacher added to it. The new assessment group looks like this:

Step 3: Add students to the assessment group
You can add students to a group by first selecting the group(s) you want using the checkbox on the left hand side. Once you have selected a group click the “Assign students to selected Assessment Groups” button and you will be taken to the “Assign students to Assessment Groups” screen where you can select students individually, from an infobase class, an infobase grade, or from another assessment group.
NB: There are TWO steps required to assign students to the group:
ONE…
Choose a list of students to work with – in the screenshot below I am choosing students from one Infobase Grade (Grade 8). Click the “add” button next to the field you are using to add the students to your list (you can do this more than once and combine classes, grades etc):

TWO…
Click the checkboxes of the students in the list to assign the students to your group(s). NB: if you don’t complete this second step then your students won’t be assigned to the group as expected.

Once you have finished selecting students you can navigate back to the assessment groups screen by clicking the back link in the top right corner of the screen. You should see that the Assessment Group now has the number of students that you added:

Step 4: Add courses to the assessment group
Any courses from the same category can be added to your assessment group. You can add multiple courses e.g. for junior schools where one teacher teaches many subjects to one class. Alternatively you could just add one subject e.g. for high schools where teachers usually teach one subject to a class.
To add courses you click the plus + symbol under the “Courses Assigned To” column of your assessment group and select the courses you wish to assign. Select courses and then click the add button to assign them to your assessment group.

Okay, so what happens next?
Once you have set up your categories, courses, and assessment groups you may be able to start capturing marks. If you think you need to make some changes to the markbooks you have created you need to learn a bit more about results:
- Creating & Modifying Results: You can find more information on creating and modifying results in a mark book HERE.