
Capture – Filtering Markbooks
Working in large markbooks with lots of results in them can be quite difficult, so we have included a filtering feature to help make this easier.
Filtering Results
The filtering feature allows you to select a subset of the markbook to view. This feature allows you to view results for just one term, just calculated results
You can filter results in a markbook based on:
- Text in the result title or description
- Result tags
- Type of result i.e. activity, result set, comment or rule based result.
- Visibility
- Locking status
- Subject schedule display
To switch on filtering use the filter (funnel) button at the top right of the markbook or settings pages:
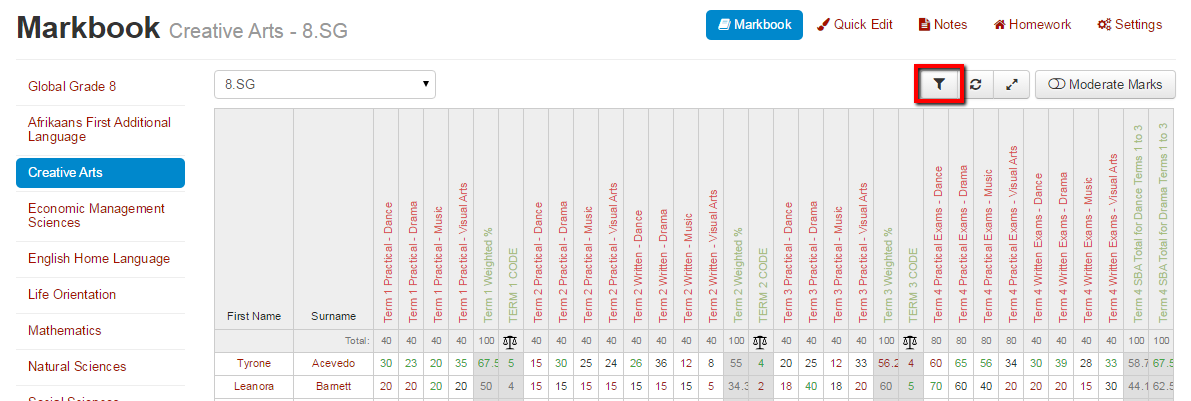
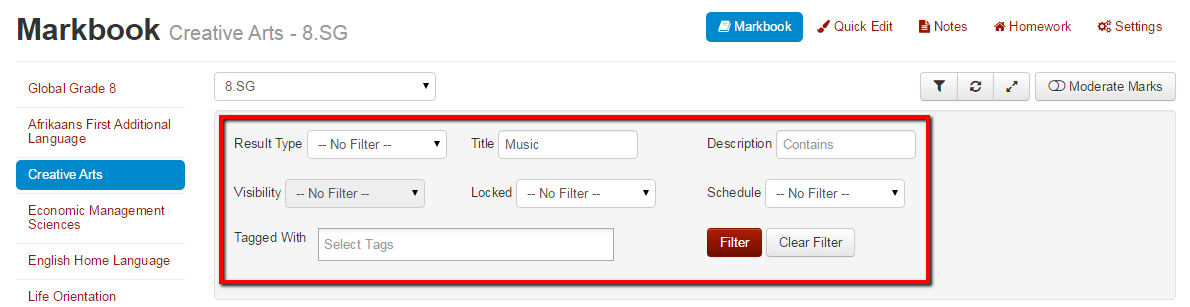
Pressing this button will open the filter options where you can select the filter criteria you want. We are going to filter on text in the title of the results of this markbook so that we just see the Music elective marks:
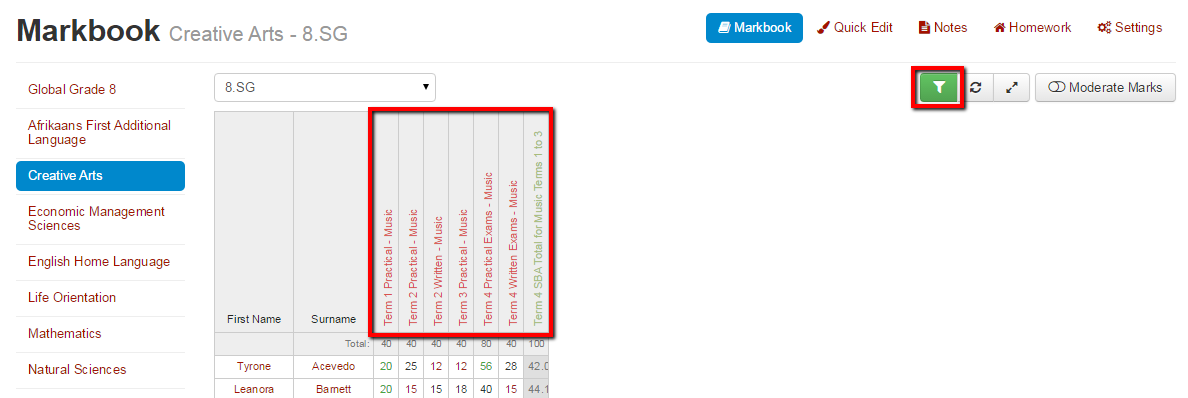
Once you have selected the filter criteria you want, press the Filter button. Only the results that match the filter criteria that you have entered will be displayed, in our example below just the Music elective results are displayed. Note that when a filter is active the filter button will be highlighted in green.
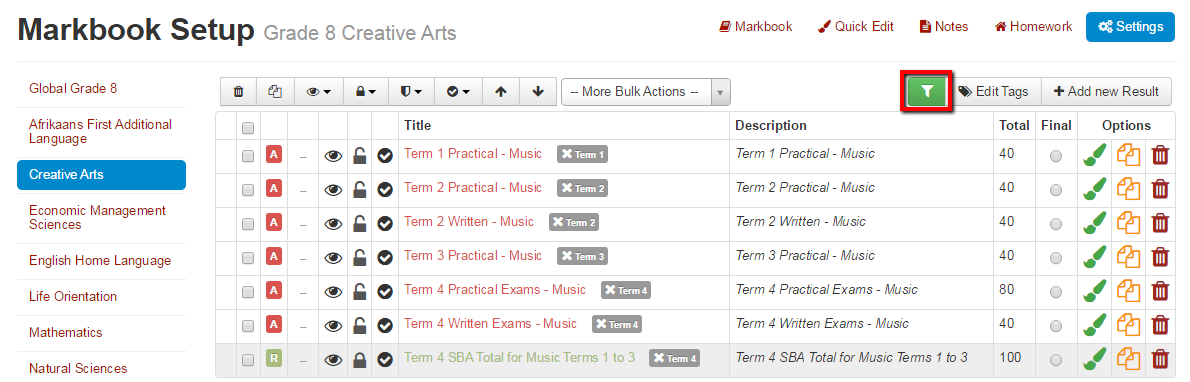
Filters can be used in both the markbook and markbook settings pages. You can also switch between the markbook and markbook settings pages and the same filter will remain active on both pages. Below is the markbook settings page from our example above, with only the Music elective results showing:
You can remove a filter and display all results again by pressing the filter button and then clicking the clear filter button in the filter options.
Can’t see the buttons and screens we’re talking about above?
Staffroom features are controlled by permissions so if you can’t see the buttons and screens we are talking about you may need to talk to your Staffroom Administrator.