
G Suite & Google Classroom Sync – Setup
Before any of the sync features can be used, the setup steps described below must be completed in your G Suite and Staffroom sites. It is very important that the steps are carried out carefully, in the correct order, and by users with the stated administrator roles. Failure to follow these instructions properly may lead to incorrect setup and unexpected results.
G Suite and Google Classroom Setup
The following setup steps must be completed in your G Suite Admin console. NB: API access and access to Google Classroom must be enabled by a G Suite for Education user with the Super Admin role.
Step 1: Check for Super Admin Role:
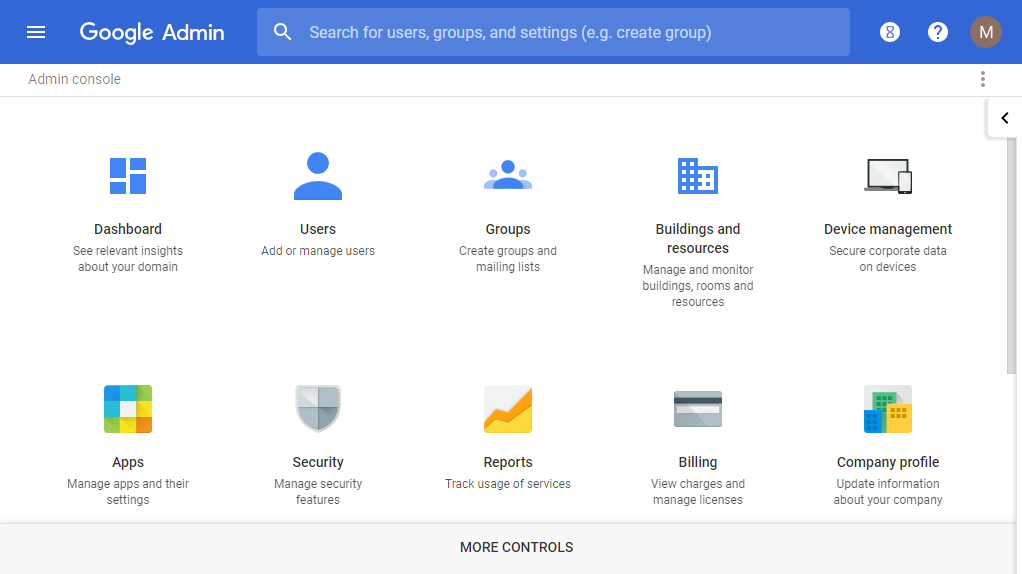
- Log in to the the Google Admin console (at admin.google.com).
- Go to Users then select your user name.
- Make sure that you have the Super Admin role in the Admin roles and privileges section.
Step 2: Enable API access:
- Go to Security and select API reference.
- Make sure the Enable API access box is checked.
Step 3: Give users access to Google Classroom:
- Go to Apps and select G Suite
- Select All users in this account* at the top left
- Check that the Classroom App has access ON for everyone
* The steps above allow all users in your G Suite to access the Google Classroom app. Users in G Suite can be put into organisational units to help you control what apps they have access to. If you have some students at your school who you don’t want to have access you can use organisational units to achieve this. Staffroom allows student grades to be linked to specific organisational units (see Step 6 in Staffroom setup below).
Step 4: Delegate domain-wide access to the Staffroom service account
- In the Google Admin console (at admin.google.com)
- Go to Security > Advanced Settings
- Select Manage API client access in the Authentication section
- In the Client Name field enter the Staffroom service account’s Client ID : 109959080102619932120
- In the One or More API Scopes field copy and paste the following list of scopes :
https://www.googleapis.com/auth/admin.directory.group, https://www.googleapis.com/auth/admin.directory.user, https://www.googleapis.com/auth/admin.directory.orgunit, https://www.googleapis.com/auth/admin.directory.domain.readonly, https://www.googleapis.com/auth/admin.directory.group.member, https://www.googleapis.com/auth/drive, https://www.googleapis.com/auth/classroom.courses, https://www.googleapis.com/auth/classroom.profile.emails, https://www.googleapis.com/auth/classroom.coursework.students, https://www.googleapis.com/auth/classroom.rosters, https://www.googleapis.com/auth/classroom.push-notifications
6. Click Authorise.
Step 5: Set a timezone for new users
You can set the time zone for new users who first sign into their managed Google accounts. Otherwise, the Admin console sets a time zone based on the user’s location when they first sign in. People can keep using this default time zone, or they can go to their own account settings and choose another time zone.
Google Classroom requires a due time to be stipulated whenever a due date is set for a homework task that is uploaded to Google. For the due time to be displayed correctly in Google Classroom, the correct time zone must be used.
- In the Google Admin console (at admin.google.com)
- From the Admin console Home page, go to Company profile > Profile
- (Optional) Next to Time Zone, in the first drop-down menu, select a default region for your users to choose from. Alternatively, you can leave this as ‘Show all time zones’ . (Users can still choose any time zone. But choosing a default region makes it easier for them to find the time zone they’re most likely to use.)
- From the second drop-down menu, select a default time zone.
Staffroom Setup
The following steps must be completed in the Settings section of your Staffroom site. These steps must be completed by someone who is a System Admin user in your Staffroom site and also the Super Admin in your G Suite (see above).
Step 6: Enable Staffroom G Suite Access:
- Log into your Staffroom site as a user with the System Admin role
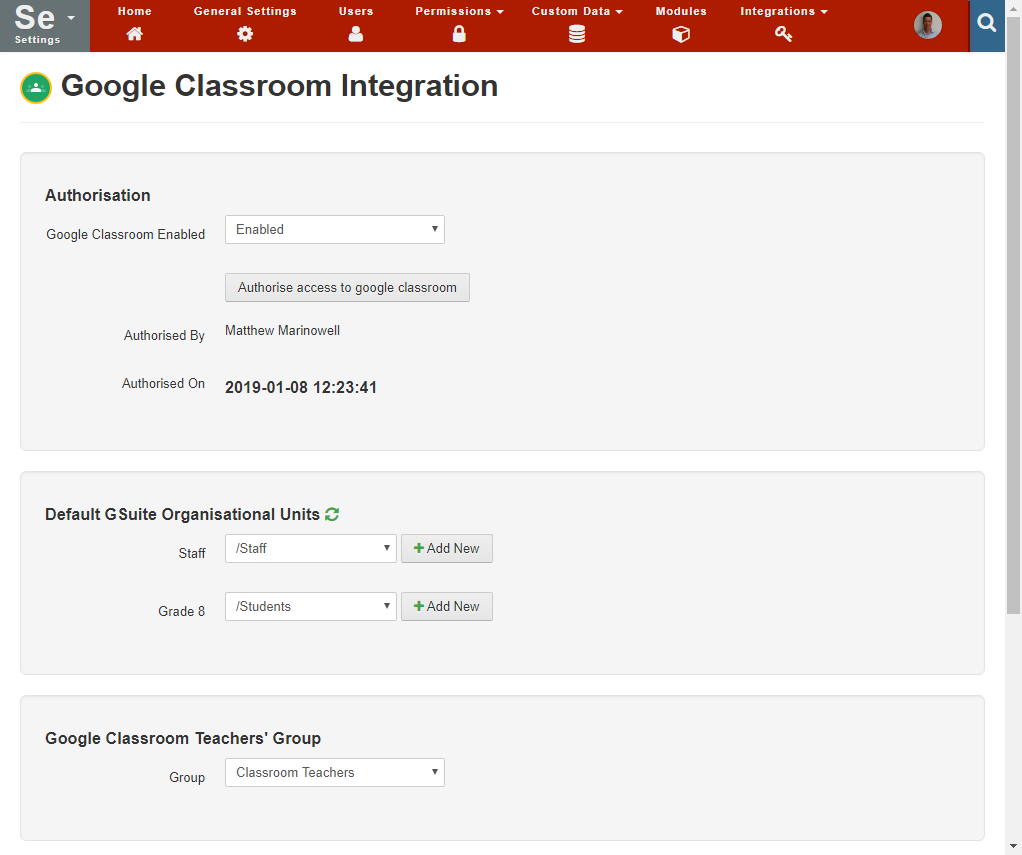
- Go to Settings > Integrations > Google Classroom Integration
- Set Enable Google Classroom Integration to ‘Enabled’ and then save this.
Step 7: Authorise G Suite Access:
- Enter the email address of your G Suite super admin account. NB: You must use an account of a G Suite admin user who has logged in to G Suite at least once and accepted the terms and conditions.
- Click the Authorise access to Google classroom button.
- You will be redirected to a G Suite login page and you should log on with your G Suite Super Admin account.
- After logging on, you will be asked to authorise Google account access for mystaffroom.net, click allow.
Step 8: Select Default Organisational Units:
Users in G Suite can be put into organisational units to help you control what apps they have access to. If you have some students at your school who you don’t want to have access to some G Suite features you can use organisational units to achieve this. Note that you can also use the G Suite Groups feature for this purpose as well.
- Select or add a new organisational unit for school teaching staff
- Select or add a new organisational unit for students in each grade listed. If you don’t want students in some grades to be synced you can leave the organisational unit blank for those grades.
The Staffroom team recommends using the same organisational unit for all student grades that you would like to sync.
Step 9: Select Classroom Teachers Group
- Select the Google Classroom Teachers group.
The Google Classroom Teachers group is a group that is automatically created in G Suite. This group controls who has teacher access in Google Classroom. The group should already exist in your G Suite but the name can be different as it can be modified.